


Mini LapbooksMini
Lapbooks? What is a mini lapbook?
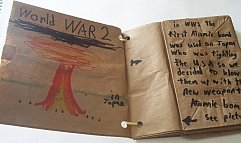 Well, it is an answer to the storage issue, a breakapart flashcard system, a creative outlet in a mini size, can be part of a bigger lapbook or a self contained mini study. Also, because of its small size can be taken on a field trip and used on the go. It is a quick, cheap and easy way to experience lapbooking and to test the waters. Or if you prefer you can use it as a simple folded mini book to add to a larger lapbook. To create mini lapbooks you probably have everything you need already but since they are so quick you might have to replenish your supplies...just in case you might actually want to make popcorn or a to go lunch. Not only that, there is no complicated folding or directions. Everything is nice and easy. There are built in pockets and flapovers...it is great! As you may know by now I am big on reviewing learned material for reinforcement...so this could also be used in a different way. I am thinking maybe as a daily concept book. Using however many pages you need per day. On each page create a mini re-cap of the lessons learned that day. The next day use it to review before presenting the next lesson. For older students mini lapbooks can be used:
Are
You Ready to Give Mini Lapbooks a Try?
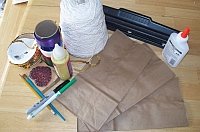
Here is what you will need:
Don't have a hole puncher, use a scissors or something to poke a hole, just be very careful and have either an older child or an adult do this. Step by Step: How to Make a Mini LapbookStep 1: 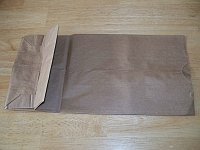 Take one of the three paper bags and place it on your working surface with the flap side up. Step 2: 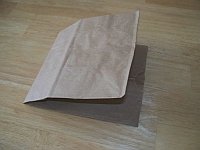 This is so easy! From the starting step position fold the paper bag in half. Step 3: 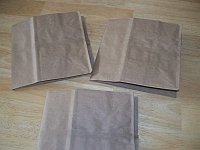 Repeat the fold with the remaining two paper bags. Step 4: 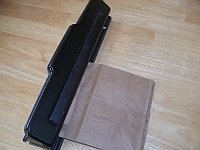 Hole punch either 2 or 3 holes on the folded edge. Step
5:
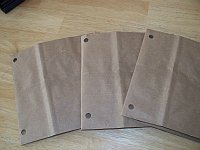 Hole punch all three bags. Step 6: 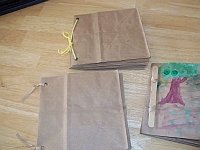
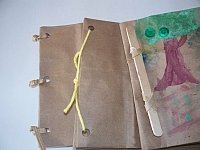 3 Examples of ways to connect Using the string or twist ties or yarn or popsicle stick and rubber bands connect the three bags together into a mini booklet. Step 7: You now have a mini lapbook complete with built in flaps, flip ups and pockets. You are now ready to let your student decorate the cover. Give your student a topic, decorating supplies (markers, stickers, crayons, colored pencils etc.) and fill your lapbook. Step 8: Use the form below and send us a picture of your completed mini lapbooks and have a featured page about your mini lapbook....Share your topics and what you covered with your mini lapbook or just show off your mini lapbook pictures. Show us Your Mini Lapbook Masterpiece!We would love to know what kinds of mini lapbooks are being made....share about yours here. See other lapbooks submitted by visitors like you...Click below to see or read about mini lapbooks from other visitors to this page...
Roman Numerals Mini Lapbook Not rated yet Go from Mini Lapbooks to Resources 4 Homeschoolers home page
|
by
JulieD
JulieD
To Teach
Is
To master
To master
Is
To know
To know
Is
To live
To live
Is
To share
To share
Is
To give
To give
Is
To Teach
Examples

Lapbook page on green

Mini Lapbook
Echo Location

Mini Lapbook
Homeschool Days

I Spy Green Insert Card

Mini Lapbook Pocket

Pocket View

Mini Lapbook Flip Flap
